
Understanding the 7 Types of Acne Causes Symptoms Solutions

Understanding the 7 Types of Acne: Causes, Symptoms & Solutions You’ve tried every cleanser, every spot treatment, every trending skincare routine—and still the breakouts keep coming back. If that sounds familiar, here’s what’s likely going wrong: most people treat their acne without understanding which type they actually have. Acne isn’t a single condition. It’s a spectrum of different disorders, each with its own causes, triggers, and treatment needs. Using the wrong approach — no matter how consistently — won’t deliver results. Worse, untreated acne can lead to permanent scarring, post-inflammatory pigmentation, and lasting damage to your confidence. This guide breaks down all 7 types of acne, explains what causes them, and outlines the most effective solutions available — including the advanced, medically supervised treatments at Facelit Clinic. What Causes Acne? Acne develops when hair follicles become clogged with sebum (the skin’s natural oil), dead skin cells, and bacteria. When the sebaceous glands overproduce oil — triggered by hormones, stress, or genetics — it creates an environment where bacteria thrive and inflammation follows. Key contributing factors include hormonal fluctuations (especially androgens), genetics, chronic stress, a high-glycemic diet, dairy consumption, pore-clogging cosmetics, and environmental pollution. The earlier acne is treated correctly, the lower the risk of permanent scarring. Delaying care, or treating the wrong type with the wrong products, is the most common reason acne leaves lasting marks. The 7 Types of Acne Explained 1. Blackheads (Open Pores) Blackheads happen when oil and dead skin clog your pores, but the pore stays open. When exposed to air, it turns dark — it’s not dirt. They usually appear on the nose, forehead, and chin. Treatment:Salicylic acid face wash, retinoids, and professional cleaning or chemical peels for deeper blockage. 2. Whiteheads (Closed Pores) Whiteheads are small bumps where the pore is completely closed. They often happen due to heavy creams or pore-clogging products. Squeezing them can make things worse and lead to infection. Treatment:Mild exfoliation (AHA/BHA), non-comedogenic skincare, retinoids, and safe extraction by professionals. 3. Papules (Red Bumps) Papules are red, swollen pimples without pus. They happen when bacteria infect clogged pores. Touching or picking them can cause marks and scars. Treatment:Benzoyl peroxide, antibiotic creams, and dermatologist-recommended retinoids. Avoid touching. 4. Pustules (Pus Pimples) These are the typical pimples with a white or yellow center. They contain pus and indicate infection. Popping them can spread bacteria and cause scars. Treatment:Benzoyl peroxide, antibiotic creams, and in some cases, oral medication. Let them heal naturally. 5. Nodules (Deep Painful Acne) Nodules are large, hard, painful lumps under the skin. They don’t have a visible head and last for weeks. Home treatments usually don’t work. Treatment:Oral medications, injections, or advanced dermatology treatments. Professional care is necessary. 6. Cystic Acne (Severe Acne) Cystic acne is the most serious type — large, painful, fluid-filled acne deep under the skin. It often leaves scars and is usually linked to hormones. Treatment:Isotretinoin, hormonal treatment, injections, and advanced skin procedures. Always needs expert care. 7. Hormonal Acne (Adult Acne) Hormonal acne usually appears on the jawline, chin, and neck. It’s common in adults, especially women, and is linked to hormonal changes like periods, PCOS, or stress. Treatment:Hormonal evaluation and medications like spironolactone or birth control, along with targeted skincare and clinic treatments. Home Care vs. Professional Treatment A solid home routine is the foundation of acne management. For mild, occasional breakouts, consistent use of a gentle cleanser, non-comedogenic moisturizer, daily SPF, and an active ingredient like salicylic acid or benzoyl peroxide can make a real difference. Supporting your skin with a balanced diet, stress management, and adequate sleep also helps more than most people realize. But home care has clear limits. If your acne involves painful nodules or cysts, recurring pustules, or breakouts along the jawline, or you’re noticing scarring and dark spots—professional treatment is the right next step. A good rule of thumb: if you’ve been consistent with home care for 6–8 weeks and your skin isn’t improving, it’s time to see a dermatologist. Professional Acne Treatments at Facelit Clinic At Facelit Clinic, treatment begins with a thorough skin analysis and acne grading — because correctly identifying your acne type determines everything that follows. Our dermatologists build personalized, phased treatment plans that address active acne, prevent recurrence, and treat existing scarring. 1. Chemical Peels for Acne Control Medical-grade peels using salicylic, glycolic, or mandelic acid dissolve dead skin cells, unclog pores, and reduce active inflammation. Ideal for comedonal and mild-to-moderate inflammatory acne. Typically 4–6 sessions with minimal downtime, with progressive improvement from the second or third session. 2. HydraFacial for Deep Cleansing This multi-step treatment simultaneously cleanses, exfoliates, extracts congestion, and infuses hydrating serums. It is safe for active acne and can be customized with anti-acne boosters. No downtime. Recommended as a monthly maintenance treatment alongside other therapies. 3. Laser Therapy for Active Acne Targeted laser wavelengths destroy acne-causing bacteria and reduce sebaceous gland activity. Highly effective for inflammatory acne — papules, pustules, and early cysts. Sessions are typically 20–30 minutes with minimal downtime, with results becoming visible within 3–4 sessions. 4. MNRF / Microneedling for Acne Scars Microneedling with radiofrequency (MNRF) stimulates deep collagen remodelling, making it one of the most effective treatments for atrophic acne scars—including ice-pick, rolling, and boxcar scars. Recommended once acne is controlled. 3–5 sessions typically required, with gradual improvement over 3–6 months. 5. PRP Therapy for Healing and Regeneration PRP therapy uses growth factors from your own blood to accelerate skin repair, improve texture, and reduce pigmentation from old acne marks. Often combined with microneedling for enhanced results. Safe for all skin types, including Indian skin. 6. Combination Therapy for Stubborn Acne For moderate-to-severe cases, the best outcomes come from combining topical medical management with in-clinic procedures. Our team builds a phased treatment plan that addresses active acne, prevents new breakouts, and treats existing scars simultaneously, including prescribed retinoids, antibiotics, hormonal therapies, and isotretinoin where appropriate. Take the First Step Toward Clear Skin Acne is deeply personal—and often exhausting. But with the right understanding of your
How To Get Rid of Pimple Marks from Face
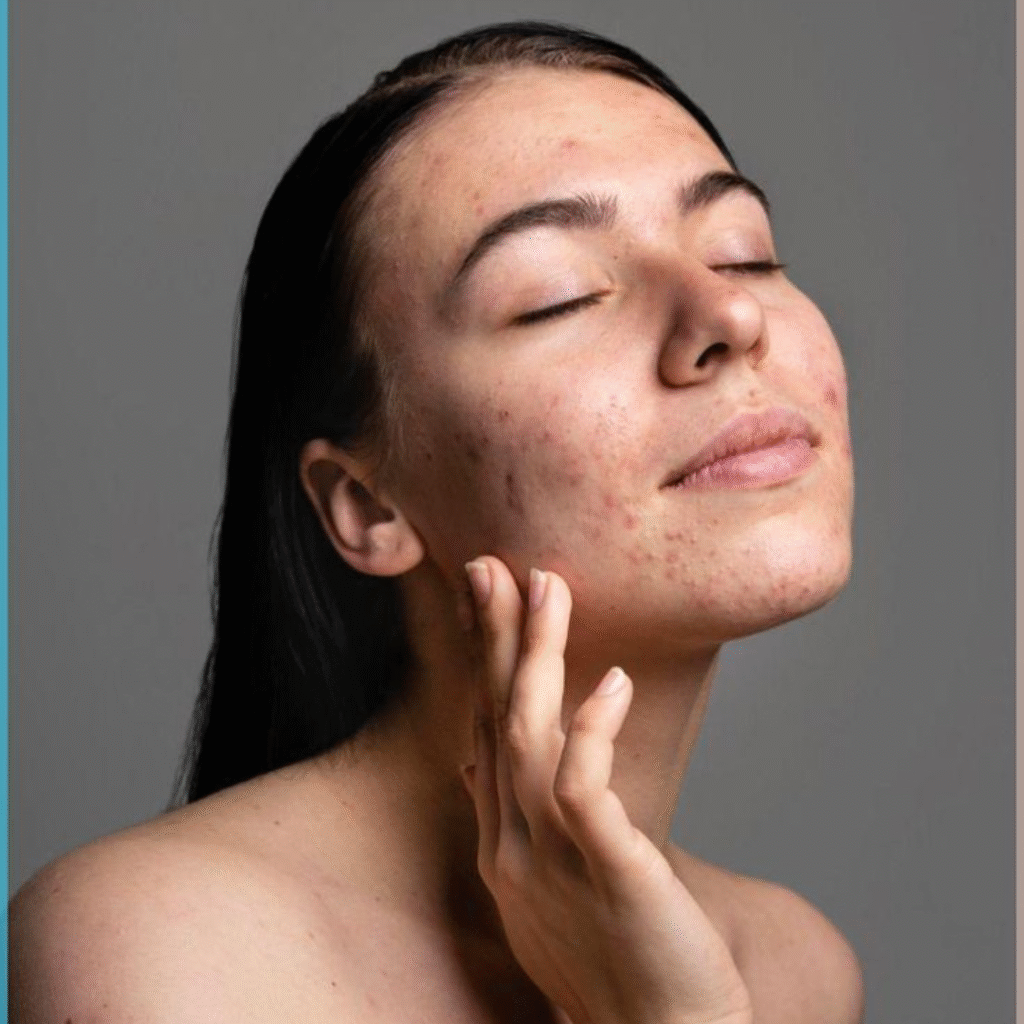
How To Get Rid of Pimple Marks from Face: Your Complete Guide to Clearer Skin You finally got rid of the pimple—but now there’s a dark spot staring back at you. If you’ve been searching for how to get rid of pimple marks from your face and feeling overwhelmed by conflicting advice, you’re not alone. Millions of people deal with the frustrating aftermath of acne: uneven skin tone, stubborn dark patches, and a complexion that still doesn’t feel camera-ready even after the breakout is long gone. The good news? Pimple marks are not permanent, and with the right approach—whether through a consistent skincare routine or professional dermatological treatment—clear, even-toned skin is absolutely within reach. Understanding Pimple Marks: What Are They, and Why Do They Happen? Pimple Marks vs. Acne Scars: An Important Distinction Many people use ‘pimple marks‘ and ‘acne scars‘ interchangeably, but they are different conditions requiring different treatments. Pimple marks—medically known as post-inflammatory hyperpigmentation (PIH)—are flat, discolored patches left behind after a pimple heals. They occur when inflammation triggers excess melanin production in the skin. Unlike true acne scars, pimple marks do not involve changes to skin texture or structure. Acne scars, by contrast, involve physical changes to the skin’s collagen—resulting in depressed (atrophic) or raised (hypertrophic) areas. This guide primarily addresses pimple marks and dark spots after pimples, though some treatments overlap. Why Do Some Marks Last Longer Than Others? Several factors can make post-inflammatory hyperpigmentation more stubborn or severe: Picking or squeezing pimples—this forces pigment deeper into the skin and dramatically worsens marks Sun exposure without SPF—UV rays stimulate melanin, darkening existing marks significantly Hormonal acne—fluctuating hormones intensify inflammation and the resulting pigmentation Deeper skin tones (Fitzpatrick III–VI)—melanin-rich skin, including many Indian skin tones, is more prone to PIH and takes longer to fade Improper skincare—using harsh, drying, or stripping products—delays the skin’s natural healing process Delayed treatment—fresh marks (under 3 months) typically respond much faster to treatment than older, deeper pigmentation Home Remedies and OTC Solutions: What Works and What Doesn’t Natural Remedies A number of kitchen and garden staples are popular for pimple mark removal at home. Aloe vera gel contains aloesin, a compound shown to mildly inhibit melanin production. Turmeric contains curcumin, which has anti-inflammatory and antioxidant properties that may offer modest brightening effects with consistent use. Green tea extract and licorice root are other natural ingredients with some evidence of pigmentation-reducing properties. The key word here is ‘modest.’ Natural remedies are gentle and unlikely to cause harm, but they work slowly — typically over months — and are best suited for very mild, fresh marks. They are not a reliable solution for deep or long-standing pigmentation. Over-the-Counter Creams and Serums Several OTC ingredients have stronger evidence behind them for acne mark treatment: Niacinamide (Vitamin B3)—reduces melanin transfer to skin cells and improves barrier function; great for daily use Vitamin C—a potent antioxidant that inhibits melanin synthesis; look for stable, well-formulated serums Alpha Hydroxy Acids (AHAs) like glycolic acid and lactic acid, exfoliate the top layer of skin, accelerating pigment turnover Kojic acid and azelaic acid—melanin inhibitors with clinical support for pigmentation treatment for face Retinoids (retinol OTC, Rx tretinoin) accelerate cell turnover and fade marks over weeks to months The Honest Limitations OTC products work best for mild, superficial, and recent marks. Deep post-inflammatory hyperpigmentation—especially in darker skin tones—is unlikely to fully resolve without professional-grade intervention. Beware of products that promise to ‘erase marks in days’; aggressive lightening agents like high-dose hydroquinone or mercury-containing creams can cause permanent skin damage and are best avoided without medical supervision. Daily Skincare Habits That Prevent New Pimple Marks Consistent daily habits are the foundation of lasting skin clarity. Here’s what dermatologists recommend: Cleanse gently—use a mild, sulphate-free cleanser twice daily; avoid scrubbing, which increases inflammation Moisturize daily—use a non-comedogenic moisturizer to support skin barrier repair; hydrated skin heals faster Sunscreen every single day—this is non-negotiable. SPF 30–50 PA+++ prevents UV-triggered darkening of existing marks and is arguably the single most important step in any pimple mark removal routine Don’t pick or pop—as tempting as it is, manipulating pimples guarantees worse and longer-lasting marks Watch your diet—high-glycaemic foods and dairy have been associated with acne flare-ups in some individuals; a balanced, antioxidant-rich diet supports skin regeneration Stay hydrated and prioritize sleep—both are essential for skin cell turnover and healing Professional Treatments for Pimple Mark Removal at Facelit Clinic When home care isn’t delivering the results you want, professional dermatological treatments offer significantly faster and more reliable outcomes. Here is a breakdown of the most effective options available at Facelit Clinic: 1. Chemical Peels for Pigmentation Correction Chemical peels use controlled concentrations of acids—glycolic, salicylic, mandelic, or TCA—to exfoliate the outer layers of skin, breaking up pigment clusters and stimulating fresh, evenly toned skin regeneration. They are highly effective for post-inflammatory hyperpigmentation and work well across most skin types. A course of 4–6 sessions spaced 2–4 weeks apart is typical, with minimal downtime (mild peeling for 2–5 days). Results begin to show after the second session and continue to improve with each treatment. 2. Laser Toning / Pigmentation Laser Laser toning uses low-fluence PICO-450 laser energy to break down melanin deposits beneath the skin’s surface. It is one of the most effective treatments for stubborn dark spots after pimples and works particularly well for Indian and South Asian skin tones, which are prone to PIH. Most patients need 6–10 sessions for optimal results, with no significant downtime. The skin gradually brightens over the weeks following each session. 3. Carbon Laser Facial The carbon laser facial (often called the ‘Hollywood Peel’) involves applying a thin layer of medical-grade carbon to the skin, then using a laser to vaporize it. This simultaneously exfoliates the surface, reduces pore size, and improves pigmentation with no downtime. It’s especially popular for patients who want visible brightening with zero recovery time. 4. Microneedling / MNRF for Texture and Marks Microneedling creates thousands of micro-channels in the skin, triggering a controlled healing response
How to Remove Blackheads and Whiteheads Permanently
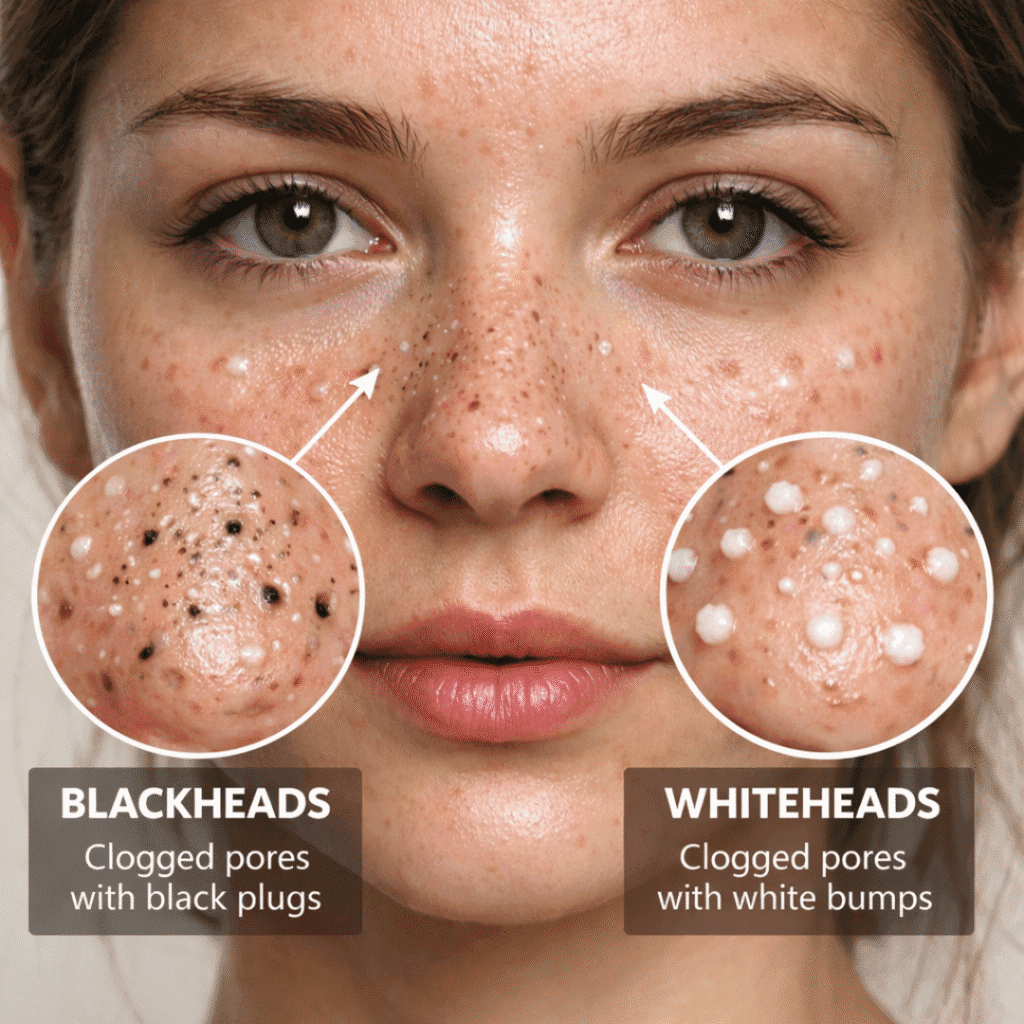
How to Remove Blackheads and Whiteheads Permanently: A Complete Guide to Clear, Smooth Skin If you’ve been struggling with stubborn blackheads on your nose, chin, and forehead, or dealing with recurring whiteheads that never seem to go away, you’re not alone. Thousands of people search every day for answers on how to remove blackheads and whiteheads permanently—and for good reason. These tiny skin concerns can make your complexion look dull, your pores appear larger, and leave you feeling frustrated despite trying countless products and DIY remedies. The truth is, achieving truly clear skin requires understanding what causes these pesky comedones, why they keep coming back, and which professional treatments can actually deliver long-term results. In this comprehensive guide, we’ll walk you through everything you need to know about blackhead removal treatment, whitehead removal treatment, and the most effective strategies to achieve permanently clearer, smoother skin. Understanding Blackheads and Whiteheads: What Are They Really? Before diving into solutions, let’s clarify what you’re dealing with. Blackheads (Open Comedones): These are small, dark bumps that appear when your pores get clogged with excess oil (sebum), dead skin cells, and bacteria. The “black” appearance isn’t dirt—it’s oxidized oil exposed to air. Whiteheads (Closed Comedones): Unlike blackheads, whiteheads are covered by a thin layer of skin. The trapped oil and debris create small white or flesh-colored bumps that don’t oxidize because they’re sealed beneath the surface. Both are forms of non-inflammatory acne, but they share the same root causes and can be equally frustrating to manage. Why Do Blackheads and Whiteheads Keep Coming Back? You’ve tried pore strips, scrubs, and extraction tools. You wash your face religiously. Yet within days or weeks, they return. Why? The answer lies in several persistent factors: Excess Oil Production: Your sebaceous glands naturally produce oil to protect your skin. When overactive—often due to genetics, hormones, or stress—they create the perfect environment for clogged pores. Dead Skin Cell Buildup: Your skin constantly sheds dead cells. Without proper exfoliation, these cells mix with oil and form plugs in your pores. Hormonal Fluctuations: Hormonal changes during puberty, menstruation, pregnancy, or conditions like PCOS can trigger increased oil production and recurring breakouts. Makeup and Skincare Products: Heavy, pore-clogging formulations can trap debris and worsen comedones, especially if not removed properly. Environmental Pollution: Airborne pollutants, dust, and toxins settle on your skin throughout the day, mixing with oil and blocking pores. Touching Your Face: Frequent touching transfers bacteria and oil from your hands to your face, contributing to breakouts. Improper Extraction Techniques: Squeezing blackheads and whiteheads with your fingers can damage your skin, enlarge pores, cause scarring, and push bacteria deeper—making the problem worse. The bottom line? Temporary fixes only address surface symptoms. Without controlling oil production, improving cell turnover, and maintaining proper pore health, these issues will continue to resurface. Can Blackheads and Whiteheads Really Be Removed Permanently? Let’s set realistic expectations. Complete “permanence” is difficult because your skin continuously produces oil and sheds cells. However, with the right combination of professional treatments, medical-grade skincare, and consistent maintenance, you can achieve long-term pore clarity and prevent most blackheads and whiteheads from forming. Think of it like managing your oral health—regular brushing, flossing, and dental cleanings keep cavities at bay. Similarly, a strategic skincare approach combined with professional deep pore cleansing treatments can keep your skin clear for extended periods. The key is addressing the root causes rather than just extracting existing comedones. Home Remedies and Over-the-Counter Products: What Works and What Doesn’t Many people start their journey with DIY methods and drugstore products. While some can help, it’s important to understand their limitations. What Can Help: Salicylic Acid Cleansers: This beta-hydroxy acid (BHA) penetrates oil to exfoliate inside pores and prevent clogging. Use 1-2% concentration daily. Benzoyl Peroxide Spot Treatments: Kills acne-causing bacteria and helps reduce inflammation. Start with 2.5% to avoid irritation. Retinol or Retinoids: These vitamin A derivatives increase cell turnover, prevent pore clogging, and improve skin texture over time. Clay Masks: Weekly use of bentonite or kaolin clay masks can absorb excess oil and draw out impurities temporarily. Double Cleansing: Using an oil-based cleanser followed by a gentle foaming cleanser ensures thorough makeup and debris removal. Non-Comedogenic Moisturizers: Even oily skin needs hydration. Choose lightweight, oil-free formulas that won’t clog pores. What to Avoid: Pore Strips: They may give instant satisfaction but only remove surface debris. They can also irritate skin and don’t prevent recurrence. Harsh Scrubs: Physical exfoliants with rough particles can micro-tear skin, worsen inflammation, and stimulate more oil production. Squeezing and Picking: This damages your skin barrier, enlarges pores, causes scarring, and can lead to infection. Lemon Juice and Baking Soda: Despite popular myths, these are too harsh and disrupt your skin’s pH balance, causing more harm than good. Skipping Sunscreen: UV damage thickens skin and enlarges pores. Always use non-comedogenic SPF 30 or higher. While good skincare habits form the foundation, they often aren’t enough for deeply embedded comedones or chronic oily skin concerns. That’s where professional intervention makes all the difference. Daily Skincare Habits to Prevent Blackheads and Whiteheads Consistency is crucial. Build these habits into your routine: Cleanse twice daily with a gentle, pH-balanced cleanser Exfoliate 2-3 times weekly with chemical exfoliants (AHAs or BHAs) Apply treatments with active ingredients like retinol or niacinamide Moisturize even if you have oily skin Use non-comedogenic, oil-free makeup and skincare products Remove makeup completely every night Change pillowcases regularly Avoid touching your face unnecessarily Stay hydrated and maintain a balanced diet Manage stress through sleep, exercise, and relaxation techniques These habits support professional treatments and help maintain results long-term. Professional Dermatologist-Recommended Treatments for Deep Pore Cleansing View this post on Instagram A post shared by facelit (@facelitclinics) When over-the-counter solutions fall short, advanced professional treatments target the deeper causes of blackheads and whiteheads. At Facelit Clinic, we offer medically supervised treatments designed for lasting pore refinement and oil control. Here are the most effective options: 1. HydraFacial Treatment How It Works: This multi-step treatment uses patented
How to Get Rid of Under Eye Bags 7 Proven Ways
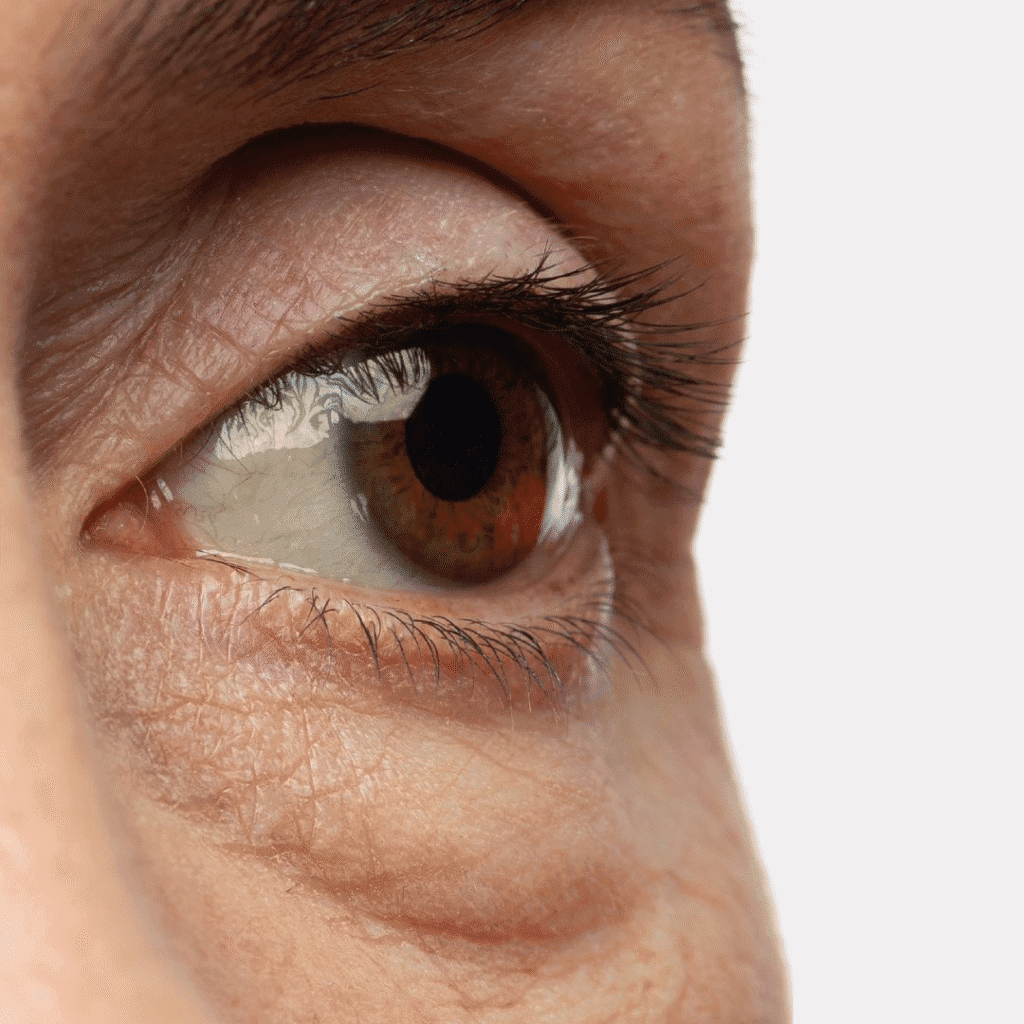
How to Get Rid of Under Eye Bags? 7 Proven Ways to Look Refreshed and Youthful You look in the mirror and see them—those puffy under-eye bags that make you look exhausted even when you’re not. Maybe you slept well, drank enough water, and still woke up looking tired and older than you feel. The frustration is real. You’ve tried cucumber slices, expensive eye creams, and countless home remedies. Some give temporary relief, but the bags always come back. You’re left wondering: what actually works? If you’re struggling with persistent under-eye bags that affect your confidence and make you look perpetually tired, you’re in the right place. Understanding how to get rid of under-eye bags starts with knowing what causes them and which proven solutions deliver real, lasting results. Let’s cut through the confusion and explore 7 evidence-based ways to address under-eye bags—from simple lifestyle fixes to advanced professional treatments. What Causes Under-Eye Bags? Before jumping into solutions, it’s crucial to understand what you’re dealing with. Under-eye bags develop when the tissues and muscles supporting your eyelids weaken. Fat that normally supports the eyes can shift forward into the lower eyelids, creating that puffy, swollen appearance. Common causes include: Aging—weakened collagen and muscle tone Genetics—inherited predisposition to puffiness Fluid retention—from salt, allergies, or sleeping position Lack of sleep disrupts skin repair and increases inflammation Prolonged screen time causes eye strain and fluid buildup Lifestyle factors—smoking, alcohol, stress, dehydration Understanding your specific cause helps determine which treatment approach will work best for you. Under Eye Bags vs. Puffiness vs. Dark Circles vs. Hollowness It’s important to understand the difference: Eye bags: Structural bulging of fat or tissue below the eye Puffiness: Temporary swelling from fluid retention Dark circles: Pigmentation or shadowing under the eyes Hollowness (tear troughs): Volume loss creating a sunken appearance Often, these conditions overlap. Someone may have both eye bags and dark circles, or hollowness that makes bags appear more pronounced. That’s why personalized assessment is crucial before choosing a treatment. 7 Proven Ways to Get Rid of Under-Eye Bags 1. Fix Your Sleep and Lifestyle Habits The foundation of any under-eye improvement starts here. Poor sleep doesn’t just make you feel tired—it causes fluid retention, inflammation, and prevents your skin from repairing itself overnight. What to do: Get 7-8 hours of quality sleep consistently Elevate your head with an extra pillow to prevent fluid accumulation Reduce sodium intake, especially in evenings Stay hydrated throughout the day Limit alcohol and caffeine before bed Manage allergies with appropriate treatment Who it works for: Everyone — this is essential whether you pursue professional treatments or not. Results: You’ll notice reduced morning puffiness within 1-2 weeks. While this won’t eliminate structural fat displacement, it significantly improves overall appearance and maintains results from other treatments. 2. Cold Compress and Targeted Eye Care Cold therapy constricts blood vessels and reduces swelling—it’s simple physics that actually works for temporary relief. How to apply it correctly: Use chilled gel eye masks, cold spoons, or cucumber slices Apply for 10-15 minutes in the morning Use gentle circular massage around the eye area to promote drainage Apply eye creams with tapping motions, never pulling or dragging Look for eye products containing: Caffeine (reduces puffiness) Vitamin K (improves circulation) Peptides (strengthen skin) Hyaluronic acid (hydrates and plumps) Who it works for: Anyone with morning puffiness or mild temporary eye bags. Results: Immediate temporary improvement. With daily routine, gradual enhancement in skin tone and minor reduction in bags. However, results require ongoing maintenance. 3. Medical-Grade Eye Creams That Actually Work Here’s the truth: most drugstore eye creams aren’t strong enough to make significant changes. Medical-grade formulations contain higher concentrations of proven active ingredients that penetrate deeper skin layers. Key ingredients that deliver results: Retinol—boosts collagen production and improves skin thickness Vitamin C—brightens and protects against damage Peptides—support collagen and elastin Niacinamide—strengthens skin barrier and reduces inflammation Who it works for: People with mild to moderate under-eye bags and early signs of aging. Results: Visible improvement in 6-12 weeks with consistent use. You’ll see reduced fine lines, improved texture, and a modest reduction in puffiness. But understand—creams cannot eliminate significant fat displacement or severe tissue laxity. At Facelit Clinic, our dermatologists recommend pharmaceutical-grade eye care products specifically matched to your skin type and concerns. 4. Chemical Peels for Dark Circles and Texture When dark circles make your eye bags look worse, gentle chemical peels designed for the delicate under-eye area can make a dramatic difference. How it works: Medical-grade acids exfoliate damaged skin layers, stimulate collagen production, and reduce pigmentation. Types used for under eyes: Glycolic acid (improves brightness) TCA peels at low concentration (deeper rejuvenation) Lactic acid (gentle hydration and exfoliation) Who it works for: Those with pigmentation, crepey skin texture, or fine lines accompanying their eye bags. Results: Brighter, smoother skin within 2-4 weeks. Best results come from a series of treatments. However, peels address skin quality rather than structural bags. Safety note: The under-eye area is extremely delicate. These peels must be performed by experienced professionals to avoid complications. 5. Skin Boosters for Deep Hydration and Skin Quality Skin boosters are injectable treatments that hydrate skin from within and stimulate collagen production. Unlike fillers, they don’t add volume—they improve skin quality itself. Popular options: Profhilo (bio-remodeling treatment) Volite (designed for delicate areas) Polynucleotides (DNA-based regeneration) Who it works for: People with thin, dehydrated under-eye skin, fine lines, and mild laxity where poor skin quality makes bags worse. Results: Visible improvement in hydration, texture, and radiance within 2-4 weeks. Reduced fine lines and improved elasticity. Effects last 6-9 months with maintenance treatments. Facelit Clinic uses advanced skin booster treatments with precise injection techniques to ensure comfortable procedures and natural-looking results. 6. PRP Therapy—Your Body’s Natural Healing Power PRP (Platelet-Rich Plasma) uses your own blood’s growth factors to regenerate and strengthen under-eye skin. A small blood sample is processed to concentrate healing platelets, then injected into the under-eye area. Why it works: Stimulates natural collagen production Improves skin thickness and
How to Get Rid of Chickenpox Scars on Face

How to Get Rid of Chickenpox Scars on Face: Expert Solutions That Actually Work If you’re struggling with how to get rid of chickenpox scars on face, you’re not alone. Many people live with visible pitted marks, dark spots, and uneven skin texture long after chickenpox has healed. These scars can affect your confidence, especially when makeup fails to cover them properly and home remedies don’t deliver the permanent results you’re hoping for. You might have tried aloe vera, lemon juice, or vitamin E oil—only to see minimal improvement. Perhaps you’re curious about professional treatments like laser or microneedling but feel uncertain about safety, cost, or downtime. The truth is, chickenpox scars on facial skin are stubborn, and without proper dermatological care, they can persist for years or even a lifetime. This guide will walk you through everything you need to know: what chickenpox scars are, why they form, and most importantly, which treatments actually work to restore smooth, even-toned skin. What Are Chickenpox Scars, and Why Do They Form on the Face? Chickenpox scars develop when the varicella-zoster virus causes deep skin lesions that damage the dermal layer. Unlike surface-level wounds, chickenpox blisters penetrate deeper into the skin. When these blisters are scratched, picked, or become infected, the skin’s natural healing process is disrupted, leading to permanent scarring. Facial skin is particularly vulnerable because it’s thinner and more delicate than skin on other parts of the body. This makes scars on the face more noticeable and harder to fade naturally. Why Facial Chickenpox Scars Are So Persistent Thin dermal layer: Less collagen support means deeper indentations High visibility: Scars on the face are exposed to sun, pollution, and daily stress Collagen disruption: Deep lesions break down collagen fibers that don’t regenerate on their own Pigmentation changes: Post-inflammatory hyperpigmentation (dark spots) can linger for months or years Types of Chickenpox Scars on Face Understanding your scar type is the first step toward choosing the right treatment. 1. Ice-Pick Scars These are narrow, deep, pitted scars that look like small puncture marks. They’re the most common type of chickenpox scar and the hardest to treat with topical products alone. 2. Boxcar Scars Wider depressions with defined edges, these scars create a crater-like appearance on the skin. They’re often found on the cheeks and temples. 3. Post-Inflammatory Hyperpigmentation (Dark Marks) These aren’t true scars but discolored patches left behind after healing. They can be brown, red, or purple and may fade over time but often require treatment for faster results. 4. Hypertrophic Scars Raised, thickened scars that form when the body produces too much collagen during healing. These are less common with chickenpox but can occur. Fresh Scars vs. Old Chickenpox Scars: What’s the Difference? Fresh scars (under 1 year old) are still in the remodeling phase. The skin is actively producing collagen, making it more responsive to treatments like vitamin C serums, silicone gels, and gentle chemical peels. Old scars (over 1 year) are mature and have settled into the skin’s structure. They require more aggressive interventions such as laser resurfacing, microneedling, or dermal fillers to stimulate collagen production and tissue regeneration. The good news? Even old chickenpox scars can be significantly improved with the right professional treatment plan. Can Chickenpox Scars Be Removed Completely? Let’s be honest: complete removal of deep chickenpox scars is challenging. However, modern dermatological treatments can dramatically reduce their appearance—often by 50% to 80%—resulting in smoother, more even-toned skin. Your results will depend on: Scar depth and type Skin tone and texture Age of the scars Treatment method and consistency Your body’s natural healing response While some superficial scars and pigmentation marks can fade almost completely, deep pitted scars typically improve significantly but may not vanish entirely. The goal is visible improvement and restored confidence—not perfection. Dermatologist-Recommended Treatments for Chickenpox Scars on Face Professional treatments target the root cause of scarring by stimulating collagen production, resurfacing damaged skin, and promoting cellular regeneration. Here are the most effective clinical solutions: 1. Microneedling with Radiofrequency (MNRF) Microneedling creates controlled micro-injuries in the skin using fine needles, triggering the body’s natural healing response. When combined with radiofrequency energy (MNRF), it heats the deeper dermal layers to boost collagen and elastin production. How it works: Tiny needles penetrate the scar tissue while radiofrequency energy tightens and remodels the skin from within. Best for: Ice-pick scars, boxcar scars, uneven texture Number of sessions: 4–6 sessions, spaced 4–6 weeks apart Downtime: 2–3 days of mild redness and sensitivity Visible results: Noticeable improvement in 3–6 months as collagen rebuilds Safety: FDA-approved, safe for most skin types when performed by trained professionals 2. Chemical Peels Chemical peels use acids (glycolic, salicylic, and TCA) to exfoliate the top layers of skin, revealing fresher, smoother skin underneath. How it works: The peel removes dead skin cells and stimulates collagen turnover, improving texture and tone. Best for: Superficial scars, pigmentation marks, mild texture issues Types: Superficial peels: Minimal downtime, subtle results Medium-depth peels: More effective for chickenpox scars; 5–7 days of peeling Number of sessions: 3–6 sessions for optimal results Downtime: Varies from a few hours to one week Visible results: Gradual improvement over 2–3 months Safety: Generally safe; darker skin tones require careful selection of peel type 3. Laser Resurfacing ( CO2 Fractional Lasers) Laser resurfacing is one of the most powerful treatments for deep chickenpox scars. It removes damaged skin layers and stimulates collagen regeneration. How it works: C02 Fractional lasers create microscopic treatment zones, leaving surrounding tissue intact for faster healing. Best for: Deep pitted scars, severe texture irregularities Number of sessions: 1–3 sessions, depending on scar severity Downtime: 5–10 days of redness, swelling, and peeling Visible results: Dramatic improvement visible within 3–6 months Safety: Highly effective but requires experienced practitioners; not ideal for very dark skin tones without proper protocols View this post on Instagram A post shared by facelit (@facelitclinics) 4. Carbon Laser Peel (PICO Laser) Also known as the “Hollywood Peel,” this treatment uses a carbon-based lotion and laser energy
How to Get Rid of Tan on Face and Body

How to Get Rid of Tan on Face and Body: Expert Solutions That Actually Work We’ve all been there—you apply sunscreen religiously, stay indoors when possible, yet that stubborn tan refuses to fade. You’ve tried every home remedy your grandmother swore by, scrubbed with lemon and honey, and applied countless face packs, but your skin tone remains uneven. The tan on your arms looks different from your face, your neck is two shades darker, and no matter what you do, that sun-damaged glow just won’t budge. If you’re frustrated with persistent tan, dark patches, and dull skin that home remedies can’t fix, you’re not alone. Understanding what truly causes tanning and knowing which treatments actually work can save you months of trial and error. Understanding What Causes Tanning on Face and Body Tanning isn’t just about spending a day at the beach. Your skin darkens as a protective response to various environmental aggressors. Primary causes of skin tanning include: Sun exposure triggers your skin to produce melanin, the pigment responsible for skin color. When UV rays penetrate your skin, melanocytes work overtime to shield deeper layers from damage. This results in that darkened, tanned appearance. Pollution and dust particles settle on your skin throughout the day, causing oxidative stress and contributing to a dull, uneven complexion. City dwellers often notice darker skin on exposed areas like the face, neck, and hands. Hormonal changes, certain medications, and lifestyle factors like poor sleep and stress can intensify pigmentation and make a tan appear worse than it is. The real issue? Most people don’t realize they’re dealing with layered tanning—a combination of surface-level tan, deeper sun damage, and underlying pigmentation issues that require different approaches. Temporary Tan vs. Deep Sun Damage: Know the Difference Not all tanning is created equal, and this is where most DIY treatments fall short. Temporary tan sits on the surface layers of your skin. It develops from recent sun exposure and can fade within a few weeks with proper care. This type responds reasonably well to gentle exfoliation and brightening ingredients. Deep sun damage penetrates into the dermis, affecting melanocytes at a cellular level. This creates stubborn pigmentation, dark spots, and an uneven skin tone that persists for months or even years. You’ll recognize deep damage by its resistance to home remedies and its tendency to return quickly after fading. Sun damage also includes textural changes—rough patches, fine lines, and a leathery appearance that ages your skin prematurely. This type of tanning requires professional intervention because it involves cellular changes that topical home treatments simply cannot address. Why Home Remedies Often Fail to Remove Deep Tan Let’s be honest about home remedies. While natural ingredients like lemon, tomato, turmeric, and yogurt have skin-brightening properties, they work primarily on superficial tans. Here’s why they’re limited: Natural ingredients cannot penetrate deep enough to address melanin production at the dermal level. They work on the outermost layer of dead skin cells, providing temporary brightness rather than lasting tan removal. Inconsistent application and incorrect combinations can irritate your skin. Lemon juice, for instance, is highly acidic and can cause photosensitivity, making your tan worse if you step out in the sun afterward. Home remedies lack the controlled, clinical-grade concentrations needed to break down stubborn pigmentation. What works as a gentle brightener cannot compete with accumulated sun damage from months or years of exposure. Most importantly, DIY treatments don’t address the root cause—ongoing UV damage and melanin production. Without professional-grade sun protection and melanin-regulating treatments, the tan returns as soon as you’re exposed to the sun again. How to Remove Tan Naturally at Home (With Realistic Expectations) Natural methods can help with a mild, recent tan and maintain results after professional treatments. Here’s what actually works, with honest limitations. Effective natural tan removal approaches: Exfoliation with gentle scrubs removes dead skin cells that hold pigment. Use gram flour mixed with milk or yogurt two to three times weekly. This helps surface tans fade gradually but won’t penetrate deeper pigmentation. Aloe vera gel soothes sun-damaged skin and provides mild brightening. Apply fresh gel nightly. It’s excellent for calming inflammation but limited for stubborn tan removal. Potato or cucumber juice contains natural enzymes that gently lighten skin. Apply the juice, leave for 15 minutes, then rinse. Results are subtle and temporary. Yogurt and honey masks provide gentle exfoliation and hydration. The lactic acid in yogurt offers mild brightening, though it is far less potent than professional-grade acids. Vitamin C-rich foods and topicals help reduce melanin production over time. Include oranges, strawberries, and tomatoes in your diet, and use vitamin C serums for better absorption. The reality check: Natural methods take eight to twelve weeks to show minimal improvement on light tan. Deep pigmentation, uneven tone on face and body, and sun damage from prolonged exposure require professional dermatological intervention for meaningful, lasting results. Professional Dermatological Treatments for Effective Tan Removal When home remedies aren’t enough, professional treatments offer scientifically proven solutions that target the tan at its source. Chemical Peels for Tan Removal Chemical peels use medical-grade acids to remove damaged outer layers and stimulate new, healthy skin growth. How they work: Glycolic acid, salicylic acid, or TCA peels are applied to your skin in controlled concentrations. The peel exfoliates dead, pigmented cells and accelerates cell turnover, revealing fresher, brighter skin underneath. Best for: Facial tan, uneven skin tone, mild to moderate pigmentation, and dull complexion. Expected results: Noticeable brightening after the first session, with optimal results after four to six sessions spaced two to three weeks apart. Peels also improve skin texture and reduce fine lines. Safety: When performed by experienced dermatologists, chemical peels are safe with minimal downtime. Some redness and peeling occur for a few days post-treatment. Carbon Laser Facial (Hollywood Peel) This advanced treatment combines laser technology with carbon particles to deeply cleanse pores and remove tan. The process: A carbon-based solution is applied to your skin, which penetrates pores. A laser then targets the carbon, creating heat that vaporizes
Yellow Peel Treatment Benefits Procedure Side Effects
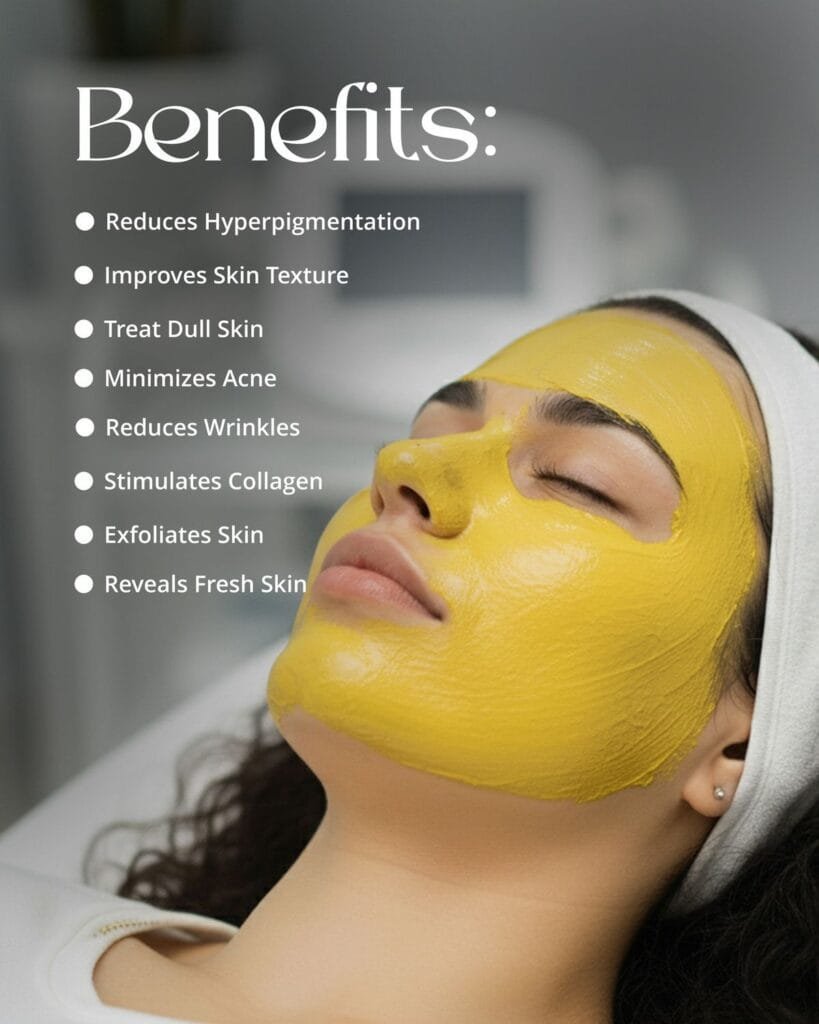
Yellow Peel Treatment: Benefits, Procedure & Side Effects If you’ve been struggling with stubborn pigmentation, uneven skin tone, acne marks, or dull, tired-looking skin, you’re not alone. These concerns can affect your confidence and seem impossible to reverse with regular skincare alone. That’s where Yellow Peel Treatment comes in—a professional chemical peel that’s gaining popularity for its gentle yet powerful ability to brighten skin, reduce pigmentation, and reverse early signs of aging without harsh downtime. Unlike aggressive peels that leave your skin red and peeling for days, the yellow peel offers visible rejuvenation with minimal discomfort. It’s especially effective for Indian skin tones, which are more prone to pigmentation issues like melasma, post-inflammatory hyperpigmentation, and sun damage. In this guide, we’ll walk you through everything you need to know about yellow peel treatment—what it is, how it works, the benefits you can expect, the step-by-step procedure, potential side effects, and how to choose the right clinic for safe, effective results. What is Yellow Peel Treatment? Yellow Peel Treatment is a medium-depth chemical peel that uses a unique blend of active ingredients, including retinoic acid (vitamin A), kojic acid, phytic acid, and azelaic acid. The peel gets its name from the yellowish tint it leaves on the skin temporarily after application. This dermatology peel treatment works by gently exfoliating the outermost layers of skin, removing dead cells, unclogging pores, and stimulating collagen production. It penetrates deeper than superficial peels, targeting pigmentation at the dermal level while promoting cell turnover for brighter, smoother, and more youthful-looking skin. What makes the yellow peel stand out is its ability to deliver dramatic results without the intense peeling or redness associated with stronger peels like TCA. It’s a favorite among dermatologists for treating melasma, acne scars, and dull complexion—especially for darker skin tones that require extra care. Who is the yellow peel treatment best suited for? Yellow peel is ideal for anyone dealing with: Pigmentation and dark spots caused by sun exposure or hormonal changes Melasma (brown or gray patches on the face) Acne marks and post-inflammatory hyperpigmentation Dull, uneven skin tone that lacks radiance Fine lines and early signs of aging Rough skin texture or large pores Sun-damaged skin with blotchy discoloration It’s particularly effective for Indian skin types (Fitzpatrick Type III–V), which are more prone to pigmentation but also more sensitive to aggressive treatments. The yellow peel offers a balanced approach—strong enough to address deep concerns but gentle enough to minimize the risk of post-treatment darkening. However, if you have active acne breakouts, open wounds, or extremely sensitive skin, your dermatologist may recommend preparing your skin first or choosing an alternative treatment. Key Benefits of Yellow Peel Treatment 1. Reduces Pigmentation and Dark Spots One of the most celebrated benefits of yellow peel for pigmentation is its ability to fade stubborn dark spots, sunspots, and hyperpigmentation. The active ingredients inhibit melanin production and break down existing pigment clusters, leading to a more even complexion over time. 2. Effectively Treats Melasma Yellow peel for melasma is a trusted option among dermatologists. Melasma is notoriously difficult to treat, but the combination of retinoic acid and kojic acid helps lighten those persistent brown patches on the cheeks, forehead, and upper lip. 3. Improves Acne Marks and Scars If acne has left behind dark marks or shallow scars, yellow peel can help. It encourages faster skin renewal, gradually lightening post-acne hyperpigmentation and smoothing out textural irregularities. 4. Delivers Radiant, Glowing Skin This skin brightening treatment works wonders for dull, tired-looking skin. By removing dead skin cells and promoting fresh cell growth, it reveals a luminous, healthy glow that lasts. 5. Anti-Aging and Collagen Boosting The retinoid component in yellow peel stimulates collagen production, which helps reduce fine lines, improve skin elasticity, and give your face a firmer, more youthful appearance. 6. Refines Skin Texture and Minimizes Pores The yellow peel exfoliates the skin surface and unclogs pores, resulting in smoother texture and smaller-looking pores. It’s a great option for anyone struggling with rough or bumpy skin. Yellow Peel Treatment Procedure – Step-by-Step Understanding what happens during a professional chemical peel can ease any nervousness and help you prepare. Here’s what you can expect during your yellow peel session at a reputable clinic: Step 1: Consultation and Skin Analysis Before the treatment, your dermatologist will assess your skin type, concerns, and medical history. This is crucial to customize the peel strength and ensure it’s safe for you. They may also photograph your skin to track progress. Step 2: Skin Preparation (Pre-Treatment Phase) For 1–2 weeks before the peel, you may be advised to use specific products like mild retinoids or hydroquinone to prep your skin. This helps improve peel penetration and reduces the risk of complications. Step 3: Cleansing and Degreasing On the day of the treatment, your face will be thoroughly cleansed and degreased to remove oils, makeup, and impurities. This ensures the peel penetrates evenly. Step 4: Application of the Yellow Peel The peel solution is carefully applied to your face using a brush or applicator. You may feel a mild tingling or warmth—this is normal. The peel is left on for a specific duration (usually a few hours to overnight, depending on the protocol). At professional clinics, the peel is applied in controlled layers, ensuring even coverage and avoiding sensitive areas like the eyes and lips. Step 5: Neutralization or Removal Depending on the type of yellow peel used, you may be asked to leave it on for several hours before washing it off at home, or the dermatologist may neutralize it in the clinic. You’ll receive clear aftercare instructions. Step 6: Post-Peel Care and Follow-Up After washing off the peel, your skin may appear slightly yellow or tight. Over the next few days, you’ll experience mild flaking or peeling as the old skin sheds. Moisturizing and sun protection are essential during this phase. Most patients require 3–6 sessions spaced 2–4 weeks apart for optimal results, depending on the severity of their concerns. Yellow
How to Get Rid of Dandruff Permanently
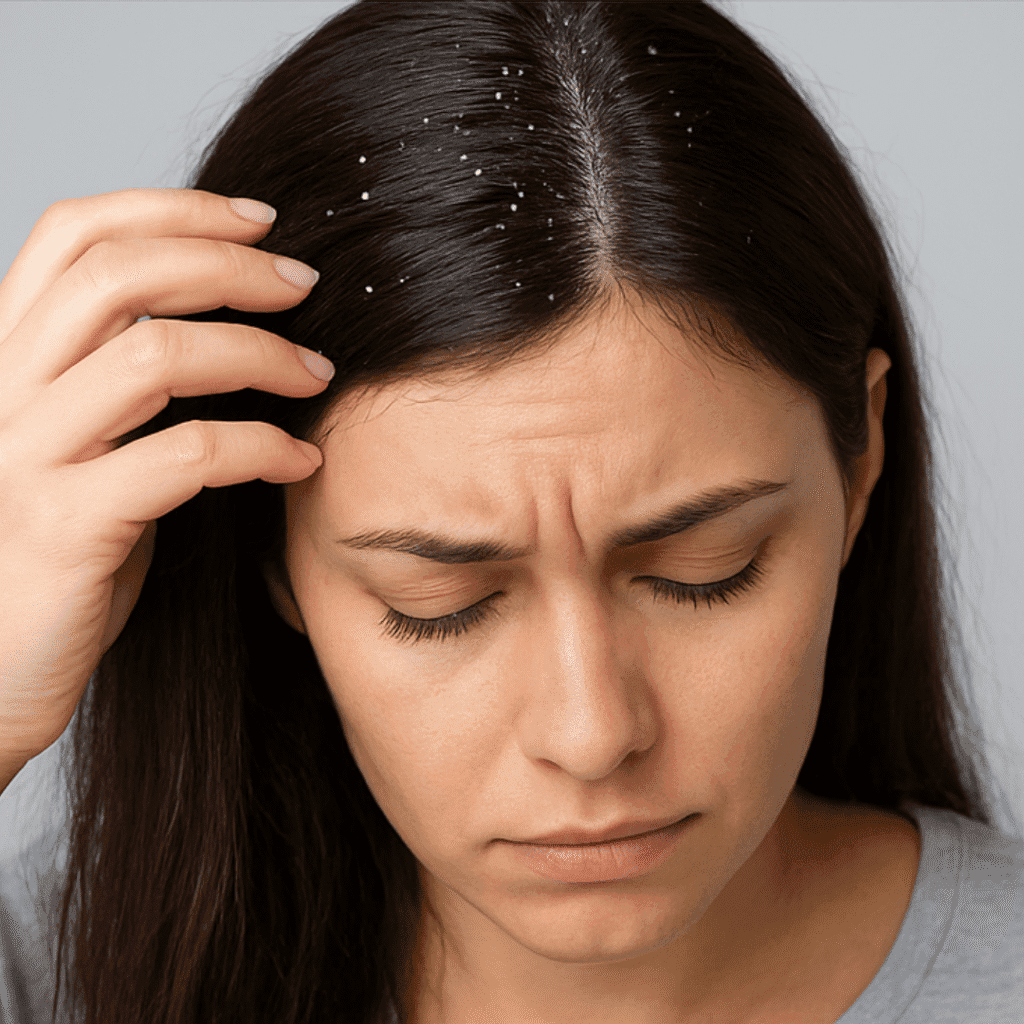
How to Get Rid of Dandruff Permanently: Proven Treatments and Expert Solutions Dandruff isn’t just a cosmetic issue—it’s a scalp condition triggered by an overgrowth of yeast-like fungi, oil buildup, or skin sensitivity. It leads to itching, flaking, and sometimes inflammation. Many people think it’s caused by poor hygiene, but that’s not the full story. In most cases, dandruff stems from seborrheic dermatitis, a common condition where your scalp produces too much oil. This creates the perfect environment for Malassezia, a fungus that naturally lives on the scalp, to multiply excessively. Environmental stress, hormonal changes, and even your diet can make dandruff worse — which is why a one-size-fits-all shampoo rarely delivers lasting results. Dry Scalp vs. Dandruff — What’s the Difference? A dry scalp causes small, white flakes due to a lack of moisture. Dandruff, on the other hand, produces oily, yellowish flakes and itching caused by excessive oil and fungal growth. Knowing the difference helps determine the right treatment — dry scalp may improve with hydration, while dandruff often needs antifungal care or professional intervention. Common Triggers of Dandruff Flare-Ups Stress and Hormonal Imbalance – Both increase oil production. Harsh Hair Products – Sulfates and alcohol dry out the scalp. Poor Diet – Low zinc or vitamin B levels can worsen dandruff. Cold Weather – Low humidity strips natural scalp moisture. Why Over-the-Counter Shampoos May Not Work Long-Term While anti-dandruff shampoos can provide short-term relief, they rarely solve the root cause of chronic dandruff. They often contain ingredients like zinc pyrithione or ketoconazole that temporarily control fungus but don’t address scalp buildup or inflammation. Short-Term Relief vs. Permanent Results Temporary fixes mask symptoms, but only professional treatments can eliminate the source of scalp irritation. That’s why clinics like Facelit Clinic specialize in customized, long-lasting dandruff treatments. Proven Home Remedies for Mild Dandruff If your dandruff is mild, you can start with natural remedies that gently restore scalp balance. Tea Tree Oil and Aloe Vera Scalp Treatment Tea tree oil fights fungal infections, while aloe vera soothes and hydrates. Mix a few drops of tea tree oil into coconut oil and massage it into your scalp. Rinse after 30 minutes for a flake-free scalp. Apple Cider Vinegar Rinse for Scalp Health ACV helps maintain the scalp’s natural pH and reduces fungal overgrowth. Mix one part vinegar with two parts water, rinse your scalp after shampooing, and feel the difference after just a few uses. Professional Treatments That Eliminate Dandruff for Good When dandruff keeps returning despite home care, it’s time for expert help. Scalp Exfoliation and Deep Cleansing Treatments At Facelit Clinic, advanced scalp exfoliation removes stubborn buildup and dead skin, allowing follicles to breathe and absorb nutrients effectively. Laser and Light Therapy for Scalp Health These non-invasive procedures use targeted light energy to reduce fungal activity, promote cell renewal, and restore natural scalp balance—leading to long-term dandruff control. Personalized Trichologist Consultation at Facelit Clinic Facelit’s certified trichologists analyze your scalp condition using high-resolution imaging. They design a custom dandruff elimination plan that targets the cause—not just the symptoms. Preventing Dandruff Recurrence — Expert Tips After treatment, follow these professional tips to maintain a healthy scalp: Wash your hair regularly with a mild, sulfate-free shampoo. Avoid excessive use of styling gels and sprays. Eat foods rich in omega-3 fatty acids and vitamin B6. Manage stress with yoga or meditation. Schedule follow-up scalp check-ups every few months at Facelit Clinic. Why Choose Facelit Clinic for Permanent Dandruff Treatment? Facelit Clinic isn’t just another beauty center — it’s a dermatology-driven clinic offering medically supervised treatments tailored for your scalp type. Experienced Dermatologists and Proven Results Their expert team uses diagnostic tools and medical-grade products to ensure visible results within a few sessions. Safe, Non-Invasive, and Long-Lasting Solutions All treatments are painless, chemical-free, and designed for sensitive scalps, ensuring permanent results without side effects. Conclusion: Start Your Dandruff-Free Journey Today You don’t have to live with embarrassing flakes or constant itching. Understanding the root cause of dandruff and seeking professional care can transform your scalp health for good. At Facelit Clinic, advanced dermatological care ensures permanent dandruff removal—safely, effectively, and confidently. Take the first step toward a clean, flake-free scalp today. Book your personalized dandruff consultation at Facelit Clinic now and say goodbye to dandruff—permanently. View this post on Instagram A post shared by facelit (@facelitclinics) FAQ Section: 1. Can dandruff be cured permanently? Dandruff can be controlled long-term and, in many cases, eliminated with the right treatment. However, since it is often caused by scalp oil, fungus, or skin conditions, it may return if proper scalp care is not maintained. Using medicated shampoos, maintaining hygiene, and treating underlying causes can keep dandruff away permanently. 2. What is the main cause of dandruff? The most common cause is a yeast-like fungus (Malassezia) that feeds on scalp oil. Other causes include dry skin, oily scalp, poor hair hygiene, stress, weather changes, and sensitivity to hair products. Identifying the root cause is essential for choosing the right dandruff treatment. 3. How long does it take to get rid of dandruff permanently? Mild dandruff can improve within 2–3 weeks with proper anti-dandruff shampoo use. Moderate to severe dandruff may take 4–8 weeks or longer, especially if medical treatment is needed. Consistency is key to achieving long-lasting results. 4. Which is the best treatment for severe dandruff? Severe dandruff often requires medicated shampoos containing ingredients like ketoconazole, zinc pyrithione, or selenium sulfide. In stubborn cases, dermatologists may recommend prescription treatments or professional scalp therapies to eliminate flakes and itching effectively. 5. Are home remedies effective for dandruff removal? Home remedies like coconut oil, aloe vera, tea tree oil, and lemon can help mild dandruff by soothing the scalp and reducing dryness. However, they may not be sufficient for chronic or fungal dandruff, which usually needs medical treatment. 6. Can dandruff cause hair loss? Yes, severe or untreated dandruff can lead to hair fall. Constant itching and inflammation weaken hair roots, causing increased shedding. Treating dandruff
How to Treat Dry and Flaky Skin in Winter
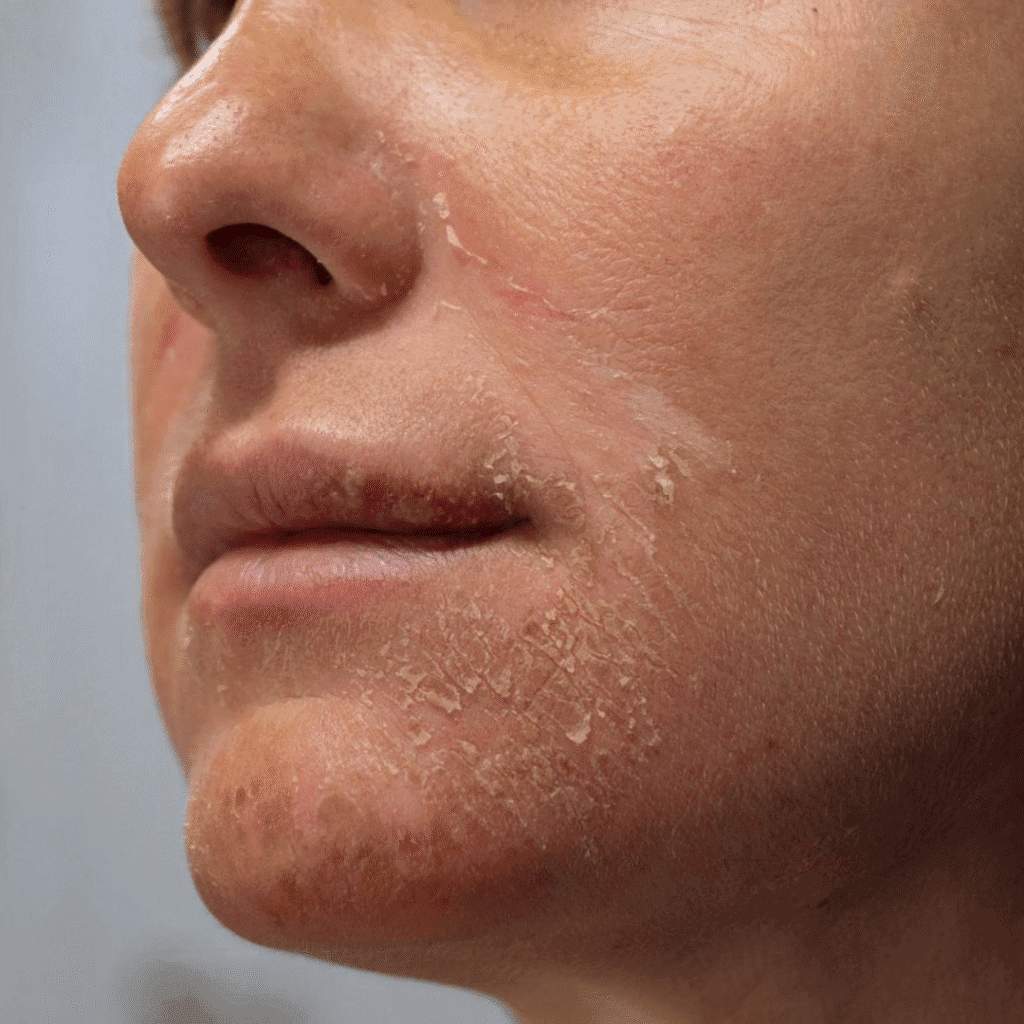
How to Treat Dry and Flaky Skin in Winter: Proven Tips for a Healthy Glow As the temperature drops and the air becomes drier, our skin often takes the biggest hit. Many people struggle to maintain moisture balance during the colder months, leading to tightness, itchiness, and visible flakiness. Understanding how to treat dry and flaky skin in winter is essential not only for comfort but also for maintaining long-term skin health. When the humidity level plummets and heaters run constantly indoors, your skin’s protective barrier weakens, allowing moisture to escape more easily. This condition, known as trans-epidermal water loss, makes the skin more prone to irritation, sensitivity, and cracking. But the good news? With the right care and consistency, you can keep your skin smooth and radiant even in the harshest winter weather. What Causes Dry and Flaky Skin in Winter? Cold Air and Low Humidity Winter air is naturally dry and cold, meaning it holds less moisture than warm air. When exposed to this dry environment, your skin loses water quickly, leading to dehydration and flakiness. Outdoor winds can also damage the outermost layer of your skin—the stratum corneum—causing micro-cracks and rough texture. Indoor Heating and Hot Showers While it feels amazing to warm up under a hot shower after a chilly day, the heat strips away the skin’s natural oils. Central heating systems also lower indoor humidity, making the air even drier. The result? Skin that feels tight, uncomfortable, and inflamed. Dehydration and Poor Diet Winter makes us crave hot coffee and comfort food, but both can contribute to dehydration. A diet low in essential fatty acids or water content can make your skin appear dull and flaky. Hydrating from the inside out is just as vital as applying moisturizer. Understand Why Your Skin Gets Dry in Winter During winter, humidity levels drop dramatically, reducing the moisture in the air—and your skin. Central heating, hot showers, and harsh cleansers make matters worse by disrupting your skin barrier, the natural layer that locks in hydration. When your barrier is compromised, water escapes faster than it can be replaced—resulting in flaky, irritated, and rough skin. At Facelit Clinic, our dermatology specialists first analyze your skin barrier health to identify the root cause of dryness before recommending any treatment. Switch to a Gentle, Hydrating Skincare Routine To combat winter dryness, use gentle, non-stripping cleansers and rich moisturizers that contain humectants (like hyaluronic acid), emollients (like ceramides), and occlusives (like shea butter). Pro Tip from Facelit Experts: Avoid alcohol-based toners and foaming cleansers — they can make your skin even drier. Instead, opt for a cream-based or oil-based cleanser followed by a hydrating serum and a barrier repair moisturizer. At Facelit Clinic, we carry medical-grade skincare products that restore moisture without clogging pores — perfect for winter-sensitive skin. Try Professional Skin Treatments for Winter Repair While a good home skincare routine is essential, sometimes dry and flaky winter skin needs more than creams and serums. Environmental factors like harsh winds, central heating, and low humidity can strip your skin of moisture faster than it can recover. This is where professional skin treatments at Facelit Clinic come in—offering deep hydration, repair, and rejuvenation that home care alone cannot achieve. Our treatments are designed not just to temporarily soothe dryness but to restore your skin’s natural barrier, improve elasticity, and bring back a healthy, radiant glow. Here’s a closer look at our most effective winter treatments: HydraFacial—Deep Cleansing and Hydration The HydraFacial is more than just a facial. It uses a multi-step process that cleanses, exfoliates, and deeply hydrates the skin. Dry, flaky patches are gently removed while your skin is infused with intense moisturizers and antioxidants. This treatment is ideal for winter because it replenishes lost hydration, calms irritation, and improves skin texture—all without downtime. Many patients notice instant smoothness and a luminous glow after a single session. Skin Booster Injections—Long-Lasting Hydration from Within For skin that feels parched despite creams and serums, Skin Booster Injections are a game-changer. Using hyaluronic acid micro-injections, this treatment delivers hydration directly into the deeper layers of your skin, not just the surface. The result is plump, supple skin with reduced fine lines and a noticeable improvement in texture. Unlike topical moisturizers, this treatment maintains hydration over weeks, making it perfect for enduring winter dryness. LED Light Therapy – Stimulate Healing and Collagen Production Winter can leave skin looking dull and tired. Our LED light therapy targets dryness and inflammation at the cellular level, stimulating collagen production and improving circulation. This accelerates skin repair, reduces redness, and enhances overall resilience. Combined with other treatments, it’s a gentle but powerful solution for restoring your skin’s natural glow and strength. Medical-Grade Chemical Peels – Remove Flakes, Reveal Radiance For stubborn dry patches or flaky skin that doesn’t respond to moisturizers, medical-grade chemical peels can make a dramatic difference. These peels gently exfoliate dead skin cells, unclog pores, and stimulate skin renewal. Unlike over-the-counter scrubs, professional peels at Facelit Clinic are precisely formulated for your skin type, ensuring effective results without irritation. After treatment, your skin feels smooth, refreshed, and deeply hydrated, ready to face harsh winter conditions. Protect Your Skin from Winter Elements Even in winter, UV rays can damage and dry your skin. Always wear a broad-spectrum SPF 30 or higher, and protect your face with scarves when outdoors. If your skin feels extremely dry or irritated, book a consultation at Facelit Clinic for a customized winter skincare plan that includes both home care and in-clinic treatments. Conclusion: Embrace the Season with Radiant Skin Dry and flaky skin in winter doesn’t have to be a seasonal struggle. By combining a gentle skincare routine, proper hydration, nourishing foods, and protective habits, you can maintain soft, glowing skin all winter long. Remember — consistency is the real secret to lasting radiance. View this post on Instagram A post shared by facelit (@facelitclinics) FAQ Section: 1. Why does my skin get so dry and flaky during winter? Cold air and
How to Remove Tan and Dark Patches on Face
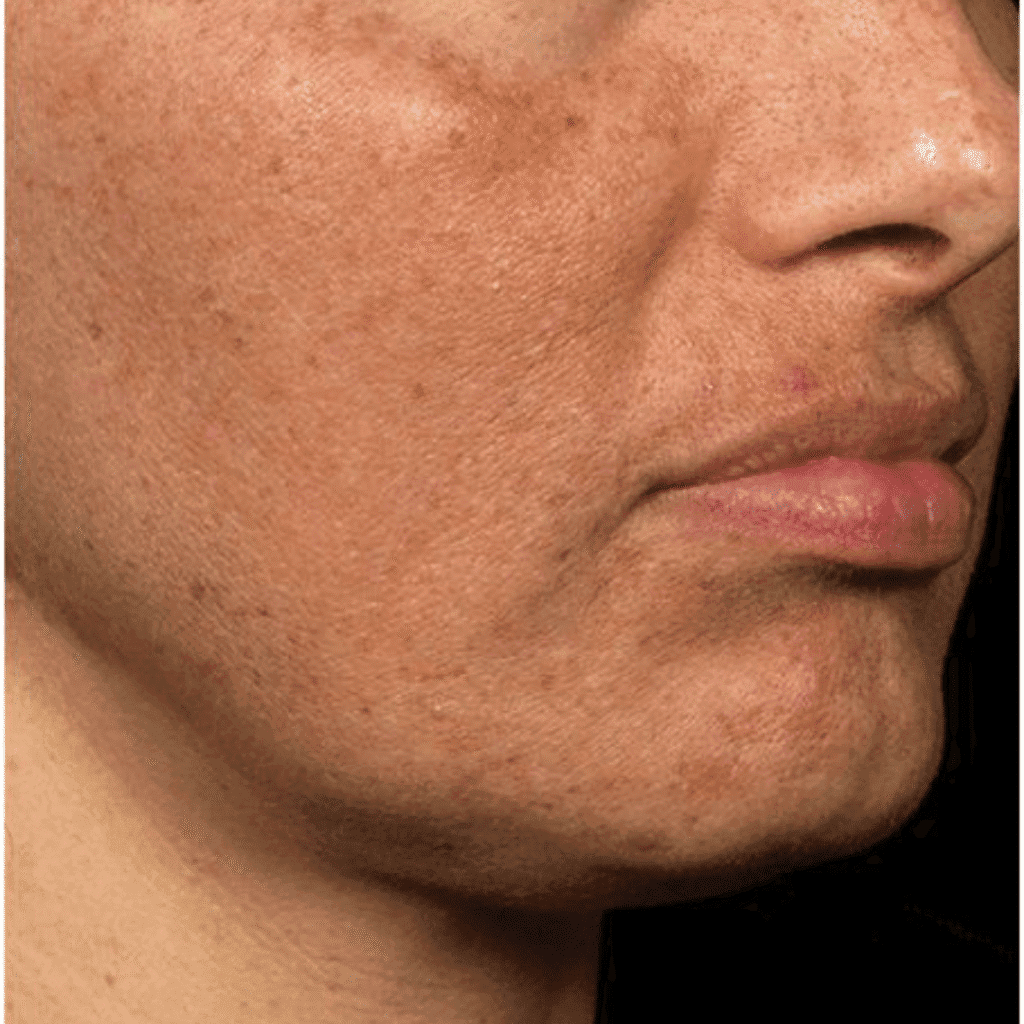
How to Remove Tan and Dark Patches on Face Tanning and dark patches on the face are some of the most common skin concerns today—especially in sunny climates. Beyond aesthetics, they can significantly affect one’s confidence and make the skin appear dull and aged. Fortunately, modern dermatology offers safe, scientifically proven treatments that can remove tan and pigmentation effectively without relying on short-term fixes. If you’ve tried creams, scrubs, or countless “miracle” products without success, it’s time to take a professional approach. In this article, we’ll uncover how Facelit Clinic uses advanced, results-driven treatments to restore your natural glow and even skin tone. Understanding Tan and Dark Patches To treat pigmentation effectively, you must first understand what’s happening beneath your skin. The skin’s color is determined by melanin, a pigment produced by specialized cells called melanocytes. When your skin is overexposed to sunlight or affected by internal imbalances, these cells produce excess melanin—resulting in tanning or dark spots. Types of Pigmentation: Tanning: Caused by sun exposure; temporary but can worsen over time. Melasma: Hormone-triggered pigmentation, often around the forehead, cheeks, and upper lip. Post-Inflammatory Hyperpigmentation (PIH): Dark spots left after acne or injury. Age Spots: Caused by prolonged sun exposure and aging. Causes of Tan and Dark Patches on Face 1. Sun Exposure The most common cause of tanning and dark spots. UV rays stimulate melanin production, which acts as a natural defense mechanism but causes uneven skin tone over time. 2. Hormonal Imbalances Fluctuations in estrogen or progesterone can trigger melasma, leading to stubborn pigmentation. 3. Acne Scarring and Inflammation After acne heals, it can leave dark marks that linger for months or years if not treated properly. 4. Environmental Damage Pollution, dust, and toxins can clog pores, dull the complexion, and accelerate pigmentation. 5. Aging and Stress With age, skin’s natural ability to renew cells slows down. Stress hormones can also stimulate melanin production, worsening dark spots. Why OTC Products Often Don’t Work Alone Most people turn to creams or serums hoping for quick results. However, over-the-counter (OTC) products often only work on the surface layer of the skin. Pigmentation, especially deeper forms like melasma, lies beneath this layer—making topical treatments alone insufficient. Professional evaluation helps identify the depth and cause of pigmentation, allowing dermatologists to target the root of the issue. Advanced Dermatological Treatments Facelit Clinic offers a range of cutting-edge treatments that go beyond superficial care to deliver visible, long-lasting results. Chemical Peels Chemical peels use controlled exfoliation to remove damaged outer layers of skin and promote cell renewal.Facelit Clinic offers: Glycolic Peels: For mild tanning and dull skin. TCA Peels: For deeper pigmentation and acne scars. Brightening Peels: Infused with antioxidants to restore glow. Benefits: Removes stubborn tan and dark spots Improves skin texture and tone Stimulates collagen production Aftercare:Use a soothing moisturizer and SPF 50+ sunscreen daily to protect new skin. Laser Treatments Laser therapy is one of the most advanced and precise methods to treat pigmentation. It works by targeting and breaking down melanin deposits beneath the skin. Advantages: Non-invasive and highly targeted Safe for all skin types Noticeable improvement in 3–5 sessions At Facelit Clinic, dermatologists use FDA-approved laser systems to ensure safety and effectiveness, delivering natural-looking, even results. Microdermabrasion This is a gentle, mechanical exfoliation technique that removes dead skin cells, enhances skin tone, and improves texture.It’s perfect for mild pigmentation, sun damage, and fine lines. Results: Smoother, brighter skin Enhanced absorption of medical-grade products No downtime Medical-Grade Facials and Light Therapies Facelit Clinic also offers HydraFacial, Carbon Laser Facial, and LED Light Therapy to rejuvenate, brighten, and even out skin tone. These treatments: Deep clean pores Deliver hydration and nutrients directly into the skin Reduce inflammation and stimulate new cell growth Personalized Skincare Programs at Facelit Clinic One of the reasons patients love Facelit Clinic is its personalized approach. Every client begins with a detailed skin analysis using advanced imaging technology that identifies sun damage, pigmentation depth, and hydration levels. From there, dermatologists design a custom treatment plan—often combining therapies like chemical peels, laser sessions, and brightening facials for optimal results. Prevention and Protection Strategies Once you’ve treated pigmentation, maintenance becomes essential. Prevention is the secret to long-term results. Key Preventive Steps: Always apply a broad-spectrum sunscreen (SPF 30–50) daily. Use antioxidant serums like Vitamin C to fight free radicals. Avoid harsh scrubs and bleaching creams that irritate the skin. Hydrate your skin with ceramide-based moisturizers. Limit direct sunlight exposure, especially between 10 AM – 4 PM. Recommended Skincare Routine for Pigmented Skin Morning Routine: Cleanser: Gentle, non-stripping cleanser. Serum: Vitamin C for brightening and antioxidant protection. Moisturizer: Lightweight hydration to maintain barrier function. Sunscreen: Broad-spectrum SPF 50; reapply every 3 hours outdoors. Night Routine: Cleanser: Removes makeup and pollutants. Treatment Serum: Retinol or Niacinamide for pigmentation repair. Moisturizer: Barrier-restoring cream to lock in hydration. This simple yet effective routine helps maintain results from professional treatments. Why Choose Facelit Clinic for Tan and Pigmentation Facelit Clinic is a leader in advanced skin rejuvenation and pigmentation management. What Sets Facelit Apart: Experienced Dermatologists: Specialists in pigmentation and laser technology. FDA-Approved Equipment: Ensures safety and precision. Tailored Solutions: Customized treatment plans for each skin type. Visible Results: Most clients see improvement within 3–5 sessions. Post-Treatment Support: Guidance on skincare, sun protection, and maintenance. Facelit’s holistic approach ensures not just temporary brightness but long-term skin clarity and health. Conclusion Tan and dark patches can make your skin look tired and uneven—but they’re not permanent. With the right combination of advanced treatments, dermatologist supervision, and daily protection, you can achieve glowing, spotless, and youthful skin. At Facelit Clinic, every treatment is guided by science, technology, and expertise—ensuring visible results you can trust. Take the step toward skin confidence today—because your skin deserves more than temporary fixes. View this post on Instagram A post shared by facelit (@facelitclinics) FAQ Section: 1. Why do I get dark patches on my face even though I use sunscreen daily? Even with sunscreen, dark patches can develop if